Painted trim adds a clean, finished look to doors, windows, and baseboards. However, dust, fingerprints, cooking grease, and muddy marks can quickly dull its surface. Many homeowners reach for strong cleaners, then discover cloudy patches, softened paint, or visible streaks. The safer question is not simply what removes dirt. It is: How to clean painted trim without damaging the finish?
This guide explores seven practical methods based on gentle cleaning habits and common maintenance experience. You will learn how to test a hidden area, choose suitable tools, and control the amount of water used. A soft microfiber cloth, mild soap, and patience often work better than abrasive pads. Small details matter. Wring the cloth well. Wipe with light pressure. Dry the trim before moisture settles along its edges.
Not every painted surface reacts the same way. Fresh paint may need extra curing time, while older finishes can become brittle or chalky. Glossy enamel usually tolerates careful washing better than flat paint. Still, assumptions can cause damage. I have found that even a “gentle” cleaner may leave a dull spot when used too heavily. That is why each method includes practical cautions, realistic expectations, and simple stopping points. If a mark remains after gentle cleaning, repeated scrubbing may create a larger problem. Clean slowly. Protect the finish.
Before cleaning painted trim, identify the paint type and inspect its condition. The finish affects how much water, pressure, and detergent it can tolerate. Glossy paint usually releases dirt more easily than flat paint. However, sheen alone cannot confirm the paint formula.
Choose a hidden area, such as the inside edge of a door casing. Dab it gently with a cotton swab moistened with rubbing alcohol. Latex paint may become slightly tacky or transfer color, while oil-based paint often remains firm. This test is useful, but not perfect. I once mistook old, chalky oil paint for latex because the surface felt soft. A second test and professional advice may prevent damage, especially in older homes where paint layers are uncertain.
Check the trim under bright, angled light. Look for peeling edges, hairline cracks, bubbling, water stains, loose caulk, and exposed wood. Do not scrub damaged paint. Moisture can enter quickly. A dusty, chalky surface also needs caution because aggressive wiping may remove the finish.
Stable latex trim can usually handle a barely damp microfiber cloth and diluted mild soap. Oil-based paint may tolerate gentle cleaning, but excessive water can still dull the surface. Test every solution in an unseen spot for several minutes. Let it dry before judging the result. My own cleaning mistake was judging success while the trim was still wet. It looked clean, then dried unevenly. Go slowly.
7 Best Ways to Clean Painted Trim Without Damage?
Gather gentle cleaning supplies before touching the trim. Use a soft microfiber cloth, lukewarm water, mild pH-neutral soap, cotton swabs, and two clean buckets. Avoid abrasive pads, concentrated degreasers, and rough paper towels. They can dull the finish or leave fine scratches that become visible in sunlight.
Protect nearby surfaces with a towel, painter’s plastic, or folded cardboard. Cover flooring, especially unfinished wood and porous stone, because water can stain or swell them. The U.S. Environmental Protection Agency reports that indoor pollutant levels may be two to five times higher than outdoor levels. Capture dust gently with a vacuum brush or damp cloth instead of spreading it through the room. The National Center for Healthy Housing also supports damp cleaning for settled household dust.
Test the solution on a hidden corner first. Wipe with light pressure, working in small sections from top to bottom. Rinse the cloth often, and keep moisture away from joints, nail holes, and loose paint. Dry each section immediately with a soft towel. I sometimes use more water than necessary, especially on heavily marked trim. That is a mistake. Painted surfaces usually need patience, not force. A slightly damp cloth often removes fingerprints while preserving the coating’s sheen. If the finish feels chalky, sticky, or unusually soft, stop and reassess before continuing.
For painted trim, neutral or near-neutral cleaners are generally the gentlest choice. Use a soft microfiber cloth, avoid abrasive powders and rough sponges, protect nearby surfaces from drips, and test any solution in a hidden area first. The pH values shown are approximate typical ranges and can vary by formulation.
Before washing painted trim, remove dust and loose dirt completely. This dry step prevents grit from becoming muddy scratches during cleaning. In my experience, a soft vacuum brush works well along baseboards, door casings, and window trim. A clean microfiber cloth can collect the remaining fine dust.
Work from the highest trim downward. Use gentle strokes, especially around corners and raised molding. Do not press hard against peeling or chalky paint. Loose particles may hide inside grooves, so brush them out carefully with a dry, soft-bristled brush. If the cloth looks gray, replace it instead of spreading dust back across the surface. I sometimes rush this stage, and the wash water quickly proves that mistake.
Tips: Check the trim in bright, angled light. It reveals dust that normal room lighting hides. Keep the cloth dry until the surface looks clean. Avoid feather dusters that simply move particles into the air. For older painted surfaces, test a small hidden area before using water. Even careful cleaning can disturb weak paint, so stop if flakes or powder appear.
7 Best Ways to Clean Painted Trim Without Damage
Painted trim collects dust, fingerprints, and cooking residue quickly. A mild, controlled method protects the finish better than aggressive scrubbing. I learned this after dulling a small section near a doorway.
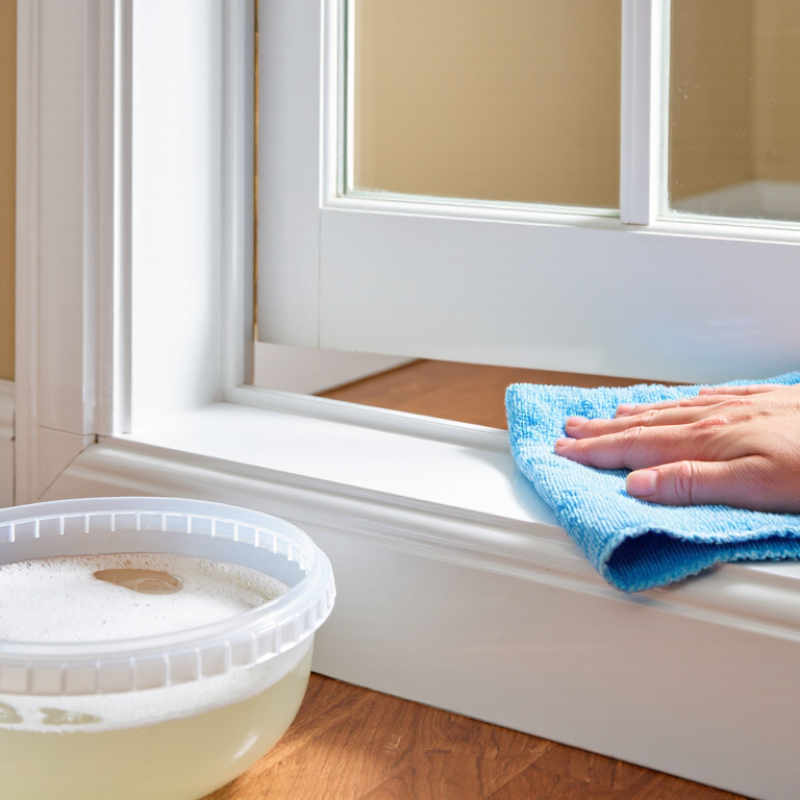
Start by dusting the trim with a soft, dry microfiber cloth. Use gentle strokes around corners and raised details. Mix warm water with a few drops of mild dish soap in a small bucket. The solution should feel barely soapy, not slippery. Wring out a clean cloth until it is damp, never dripping.
Test an unseen area first. Wait several minutes and check for color transfer, bubbling, or a cloudy sheen. If the paint looks stable, wipe one small section at a time. Keep the pressure light. A soft toothbrush can lift dust from grooves, but avoid stiff bristles and abrasive pads. For greasy marks, hold the damp cloth against the spot briefly. Do not flood the edge, where moisture may reach the wall or loosen old paint. Dry each section with a separate towel.
Some stains resist a mild solution. That does not always justify stronger chemicals. Repeated rubbing can create a shiny patch, even when the trim appears clean. I would rather leave a faint mark than remove the paint. Recheck the surface in daylight, because artificial light can hide uneven sheen.
| No. | Cleaning Method | Best For | Recommended Materials | Controlled Procedure | Risk Level |
|---|---|---|---|---|---|
| 1 | Dry Dusting First | Loose dust, cobwebs, and light surface debris | Clean microfiber cloth, soft paintbrush, or vacuum with a brush attachment | Remove loose particles before using moisture. Work from the top edge downward with light pressure to reduce scratching. | Very Low |
| 2 | Warm Water and Mild Soap | Routine fingerprints, light grime, and everyday dirt | Warm water, a small amount of mild dish soap, two soft cloths, and a dry towel | Mix approximately 1 teaspoon of mild soap into 1 gallon of warm water. Dampen—not soak—the cloth, wipe gently, then rinse with a clean damp cloth and dry immediately. | Low |
| 3 | Diluted White Vinegar Solution | Mild grease, kitchen film, and mineral residue | White vinegar, water, spray bottle, microfiber cloth, and clean water | Combine equal parts water and white vinegar. Apply the solution to the cloth rather than directly onto the trim, wipe briefly, rinse, and dry. Test first because vinegar may affect some finishes. | Moderate |
| 4 | Baking Soda Spot Paste | Small scuff marks and stubborn localized spots | Baking soda, water, soft cotton cloth, and a clean damp cloth | Make a thin paste with baking soda and water. Dab it onto the mark, wait no more than 1 minute, and wipe gently without scrubbing. Rinse and dry thoroughly. | Moderate |
| 5 | Soft-Bristle Detail Cleaning | Grooves, decorative profiles, corners, and seams | Soft toothbrush or detailing brush, mild soapy water, and microfiber cloth | Dip only the brush tips into the cleaning solution. Work carefully along recessed areas, then remove moisture with a dry cloth to prevent swelling or trapped dampness. | Low |
| 6 | Melamine Sponge for Isolated Marks | Persistent black marks, shoe scuffs, and pencil residue | Damp melamine sponge, clean water, and soft towel | Use only a small, damp piece and apply minimal pressure to a limited area. Stop as soon as the mark fades because the sponge is mildly abrasive and may dull the paint. | Higher |
| 7 | Careful Rinse and Drying | Removing cleaner residue and protecting the finish | Clean water, lint-free microfiber cloth, and dry towel | After any wet cleaning, wipe with a clean cloth lightly dampened with water. Dry all edges, joints, and corners immediately to prevent streaks and moisture damage. | Very Low |
Rinse, Dry, and Handle Stubborn Marks Without Damaging Paint
Painted trim collects dust, skin oils, and fine grit near doors and stair rails. Start with a dry microfiber cloth, then vacuum crevices with a soft brush. Use lukewarm water and a few drops of mild, pH-neutral detergent. Wring the cloth until it feels damp, not wet. Work in small sections, moving from clean areas toward dirtier edges. Rinse the cloth often. Do not soak joints or wooden corners.
Rinsing removes detergent residue that can leave a dull film. Follow immediately with a dry, lint-free towel. This matters because standing moisture can soften weak paint edges.
The U.S. Environmental Protection Agency reports that indoor pollutant levels can be two to five times higher than outdoor levels. A controlled, low-chemical method helps limit unnecessary residue indoors. Ventilate gently while cleaning.
Stubborn marks need patience. Hold a damp cloth over the spot for thirty seconds, then wipe lightly. For rubber scuffs, use a barely damp melamine pad only after testing a hidden area. It works by mild abrasion and can remove sheen. Avoid rough sponges, concentrated cleaners, and aggressive scrubbing.
ASTM D2486 uses standardized scrub testing to evaluate paint durability, but household trim rarely matches laboratory conditions. My own mistake was trusting a “safe” cleaner without testing it. The paint looked fine at first, then dried unevenly.
Test, rinse, and inspect under side lighting.
Test a hidden edge with a cotton swab moistened with rubbing alcohol. Latex paint may feel tacky or transfer color. Oil-based paint often stays firm. This test is not perfect. Older layers can confuse the result, so consider a second test or professional advice.
Inspect the surface under bright, angled light. Look for peeling edges, hairline cracks, bubbling, water stains, loose caulk, and exposed wood. Do not scrub damaged paint. Moisture can enter quickly.
Use a soft vacuum brush along baseboards, door casings, and window trim. Then wipe remaining dust with a clean, dry microfiber cloth. Work from the highest trim downward. Replace the cloth when it turns gray.
Pressure can spread grit into scratches or remove weak paint. It may also create a shiny patch through repeated rubbing. Use gentle strokes around corners and raised molding. I sometimes rush this step. That usually shows later.
Mix warm water with a few drops of mild dish soap. The mixture should feel barely soapy, not slippery. Use a clean cloth wrung until damp, never dripping. A mild method is safer than aggressive scrubbing.
Apply it to an unseen area and wait several minutes. Let the spot dry before judging the result. Check for color transfer, bubbling, or a cloudy sheen. Wet trim can look deceptively clean.
Use a soft toothbrush for dust inside narrow grooves. For greasy marks, hold a damp cloth against the spot briefly. Avoid stiff bristles and abrasive pads. Do not flood edges.
Stop before using stronger chemicals or excessive pressure. Repeated rubbing can remove paint and leave an uneven sheen. A faint mark may be better than damaged trim. Recheck the surface in daylight.
Cleaning painted trim safely starts with understanding what you are working with. Identify whether the surface has a water-based or oil-based coating, and inspect it for peeling, cracks, chips, or weak areas. Before washing, gather soft cloths, a gentle cleaning solution, clean water, and non-abrasive tools, while protecting nearby floors and walls from drips. If you are wondering how to clean painted trim without damaging the finish, begin by removing dust and loose dirt with a soft brush or dry microfiber cloth. This prevents grit from scratching the paint during washing.
Use a mild, diluted solution and apply it with a lightly damp cloth rather than soaking the trim. Work in small sections with gentle strokes, then wipe away residue with clean water and dry the surface promptly. For stubborn marks, repeat the process carefully or use minimal pressure instead of harsh chemicals, rough sponges, or excessive moisture. Allow the trim to dry fully and check for any damage before continuing.

Green Earth Wood