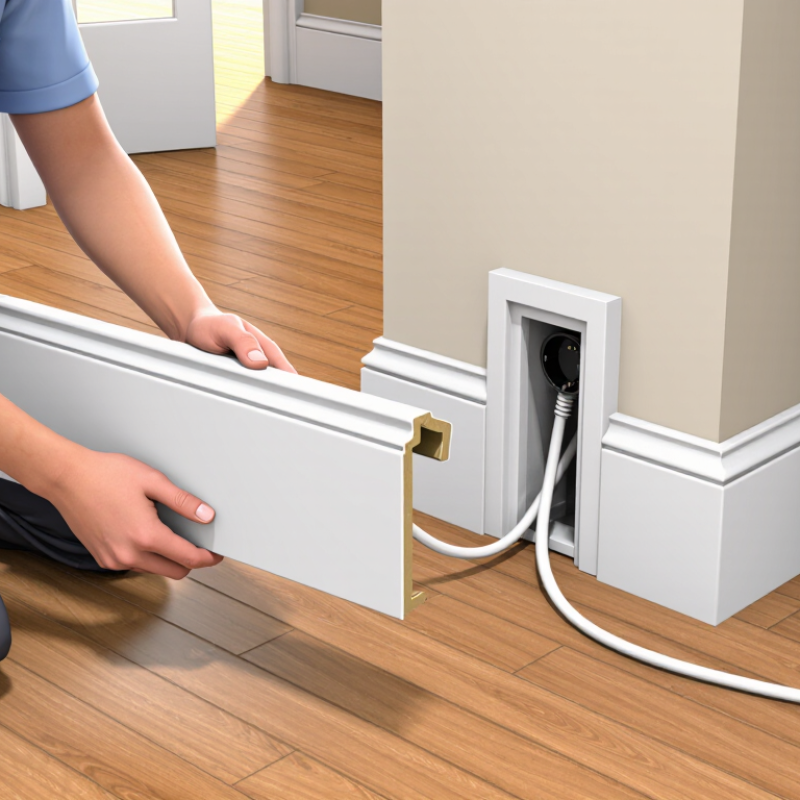
| 1. Plan the Route |
Map the cable path before removing or cutting any trim. |
Use the shortest practical route along the wall perimeter. Mark cable entry and exit points, corners, outlets, and equipment locations. |
Measuring tape, pencil, chalk line, level, cable route sketch |
Route is visible and free from planned drilling points. |
| 2. Identify the Wall Type |
Inspect the wall and existing skirting board. |
Check whether the wall is drywall, plaster, masonry, or wood. Confirm that the skirting board is thick and deep enough to conceal the cable or cable channel. |
Stud finder, inspection light, small probe, level |
Wall structure and fixing points are known. |
| 3. Check for Hazards |
Locate hidden electrical, plumbing, heating, and data services. |
Do not drill or nail where concealed services may run. Switch off power before working near electrical wiring and verify that circuits are de-energized. |
Multifunction detector, non-contact voltage tester, circuit labels |
Potential hazards have been identified and avoided. |
| 4. Measure the Cable |
Calculate the required cable length. |
Measure the complete route, including vertical drops and corner changes. Add approximately 10% extra length for routing and termination, without creating tight loops. |
Measuring tape, cable marker, cable ties or hook-and-loop straps |
Cable reaches every connection with moderate spare length. |
| 5. Select Cable Protection |
Choose a suitable protective method. |
Use a purpose-made cable channel, conduit, or trunking where the cable may be crushed, abraded, or exposed to impact. Keep power and communication cables separated where required by local regulations. |
Paintable cable channel, conduit, grommets, clips, separators |
Cable is protected from abrasion and accidental impact. |
| 6. Prepare the Skirting Board |
Remove or modify the trim carefully. |
Score painted joints before removal. Label each section and keep fasteners organized. If cutting a channel, keep sufficient material so the trim remains rigid. |
Utility knife, pry bar, oscillating tool or router, dust sheet |
Trim remains straight, stable, and suitable for refitting. |
| 7. Prepare the Wall |
Clean and level the installation surface. |
Remove dust, loose paint, grease, and adhesive residue. Repair cracks or holes and allow filler or plaster to dry before applying adhesive or refitting trim. |
Brush, vacuum, scraper, filler, sandpaper, damp cloth |
Surface is clean, dry, sound, and reasonably flat. |
| 8. Install the Cable |
Position the wire without stressing it. |
Follow the cable manufacturer's minimum bend-radius guidance. Avoid sharp bends, crushing, staples through the cable, and excessive tension. Keep connectors accessible rather than burying them inside a wall or trim. |
Cable clips, adhesive pads, conduit, fish tape, edge grommets |
Cable lies smoothly and connections remain accessible. |
| 9. Fit the Trim or Channel |
Secure the skirting board, molding, or cover. |
Fix the trim to the wall or studs without piercing the cable. Leave enough room for the cover to close fully and avoid compressing the wire. |
Level, drill, wall plugs, screws, finishing nails, adhesive, caulk |
Trim is flush, secure, and does not pinch the cable. |
| 10. Finish the Surface |
Close joints and conceal minor gaps. |
Use paintable caulk at visible joints and fill small fixing holes after the trim is stable. Allow filler and caulk to cure according to the product instructions before painting. |
Decorators' caulk, filler, putty knife, fine sandpaper, primer, paint |
Joints are smooth and the finish matches the wall. |
| 11. Test the Installation |
Check the cable and connected equipment. |
Inspect for kinks, crushed sections, loose trim, exposed conductors, and excessive heat. Test continuity or signal performance using the appropriate tester for the cable type. |
Flashlight, continuity tester, network tester, signal tester |
Cable functions correctly and no visible damage is present. |
| 12. Record the Route |
Document the concealed cable path. |
Photograph the route before closing the trim and note measurements from fixed reference points. Keep the record for future drilling, decorating, or repairs. |
Camera, measurement notes, floor plan, cable labels |
Future service locations are clearly documented. |
 Green Earth Wood