Can I install new trim over old existing trim? Often, yes—but the result depends on what is behind the paint. Existing casing must be firmly attached, dry, and reasonably flat. Loose boards, swollen edges, and thick paint ridges can make new trim sit unevenly. A small mismatch at a doorway can catch the eye every time you pass.
The financial stakes are modest, but home updates are widespread. Harvard’s Joint Center for Housing Studies reported that U.S. remodeling and repair spending reached about $472 billion in 2022. That figure covers many projects, not trim installation specifically; it helps explain why practical, low-disruption upgrades matter to homeowners. This guide’s ten tips focus on fit, fastening, and finish. Check door and window clearances, measure the added thickness, and locate solid backing before choosing an installation method. A narrow extension jamb or a carefully planned return may be needed where new casing crowds a door. Sometimes, removal is cleaner. That part is easy to underestimate. Older trim can also hide uneven walls or brittle corners, so test a short section before committing. The goal is not merely to cover the old profile. It is to create a secure, consistent edge without trapping moisture or leaving awkward gaps. These checks make the decision more reliable, though no checklist can replace inspecting the actual wall.
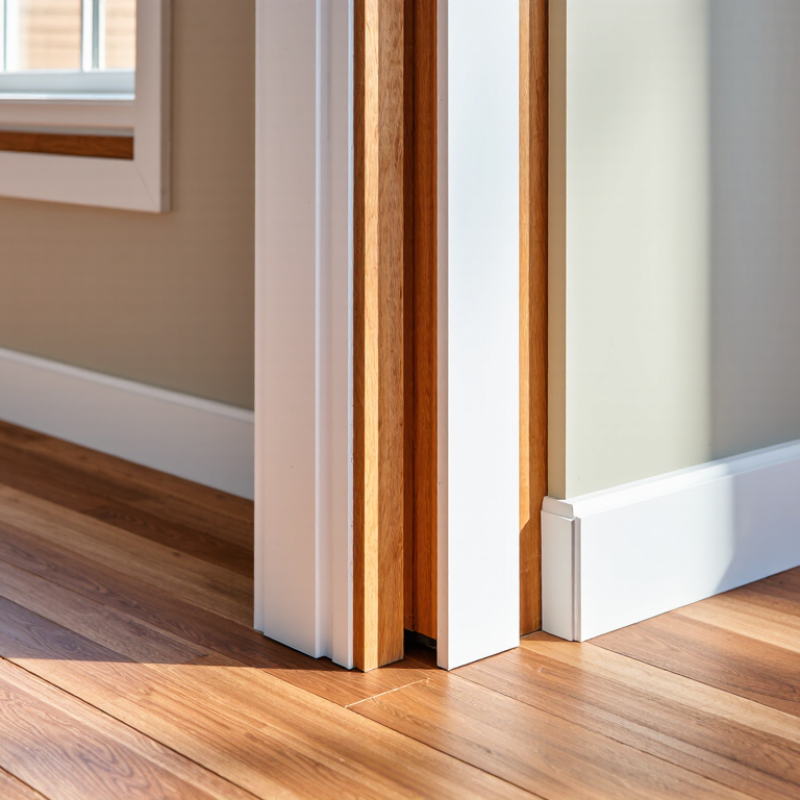
Before covering old trim, check whether it is firmly attached. Press along its length and watch for movement, loose nails, or gaps opening at the joints. A small wobble can become a larger problem when new trim is fastened over it. Tap suspicious areas gently; a hollow sound may point to a loose section, though sound alone is not proof. I still find this check easy to rush.
Next, test the surface for flatness. Hold a straightedge against the trim and look for dips, raised corners, or bowed sections. Even a narrow gap can make the new piece sit crooked or leave an uneven reveal. Remove small paint ridges and protruding fasteners, but do not force new trim over a badly warped base. That shortcut rarely looks better.
Check for moisture before installation. Look for soft wood, dark stains, peeling paint, or a musty smell, especially near windows and floors. Use a moisture meter if the surface seems questionable, and investigate the source of any dampness before covering it. New trim can hide warning signs, not fix them. If you are unsure whether damage is active, pause and get a qualified assessment. It may feel like an extra step, but replacing sound, dry trim is easier than reopening a finished wall.
| Tip | What to Inspect | How to Check | What to Look For | Recommended Action |
|---|---|---|---|---|
| 1 | Attachment to the wall | Press along the existing trim and check for movement, loose joints, or nails pulling away. | The trim feels firmly attached and does not shift or rattle. | Refasten loose sections into framing where practical before covering them. |
| 2 | Flatness of the surface | Place a straightedge across the trim and check for bows, twists, and abrupt high spots. | The new trim can sit evenly without being forced to follow a pronounced curve. | Correct high spots or use shims where appropriate; remove badly warped sections. |
| 3 | Moisture and water damage | Look for staining, swelling, soft areas, peeling paint, or a musty odor; use a moisture meter if available. | The trim is dry and sound. As a general interior screening range, wood is often near 6–12% moisture content, though local conditions vary. | Find and correct the moisture source. Replace damaged material rather than covering it. |
| 4 | Rot, mold, and insect damage | Probe suspicious areas gently with a small tool and inspect joints and lower sections near floors. | The material is solid, with no visible decay, active mold, or insect galleries. | Remove and address damaged material and its cause before installing new trim. |
| 5 | Profile and surface compatibility | Check whether the new trim will sit securely over the old profile without rocking or leaving large gaps. | The contact surfaces align well enough for fastening and a neat finish. | Choose a suitable profile, or remove the existing trim if its shape prevents a stable fit. |
| 6 | Door and window operation | Open and close doors and windows; inspect clearances around casings, hinges, latches, and hardware. | The added trim will not obstruct movement or interfere with hardware. | Measure the added thickness and adjust the trim plan where clearances are limited. |
| 7 | Corners and joints | Inspect miters, butt joints, and transitions for gaps, separation, or movement. | Existing joints are stable and will not create uneven support beneath the new trim. | Repair or refasten loose joints; plan new joints so they do not stack awkwardly over old ones. |
| 8 | Paint, finish, and adhesion | Check for peeling, chalky, glossy, or contaminated surfaces where adhesive or caulk may be used. | The surface is clean and sound, with no loose coating or residue. | Scrape loose finish and clean the surface. Follow product directions for sanding or priming. |
| 9 | Fastener length and substrate | Account for the thickness of both trim layers and identify where the fasteners will anchor. | Fasteners can pass through the new trim and existing trim and still reach a suitable backing. | Select fasteners for the combined thickness and intended substrate; avoid relying only on a weak or loose layer. |
| 10 | Added thickness and finished appearance | Test-fit a short offcut and inspect transitions at floors, ceilings, adjoining walls, and neighboring trim. | The added projection looks intentional and does not create awkward steps or obstruct adjacent finishes. | Use a transition detail where needed, or remove the old trim if a clean, flush result is not achievable. |
Press along its length and watch for movement, loose nails, or opening joints. A hollow tap may suggest looseness, but it is not proof. I still sometimes rush this check.
Hold a straightedge against it and look for dips, raised corners, or bows. Remove paint ridges and protruding fasteners. Do not cover a badly warped base.
Look for soft wood, dark stains, peeling paint, or a musty smell near windows and floors. Use a moisture meter if needed. Find the dampness source before installation.
Use a stud finder, then confirm likely locations with a small test mark. Studs are often 16 inches apart, but openings and repairs can interrupt that pattern.
Choose fasteners that pass through both trim layers and reach framing. Avoid blind nailing near switches or outlets. A missed stud may leave narrow trim poorly secured.
Yes. Dry-fit corners and straight runs first, checking for gaps and raised edges. I sometimes trust measurements too much; a test piece can expose a poor fit.
No. Use paintable caulk for narrow gaps, not large cutting errors. Place straight-run joints over solid backing when possible, away from old seams.
Test a short section near the casing. Open and close the door, and check window sashes, latches, and screens. Leave room for paint buildup. A few millimeters matter.
Can I install new trim over old existing trim? In many cases, yes, provided the original trim is firmly attached, reasonably flat, and free from moisture damage. Before starting, inspect it for loose sections, warping, or signs of water intrusion, and repair any problems. Measure how much the new trim will add to the wall or opening so you can confirm that doors, windows, and nearby hardware will still operate and fit properly.
Plan the finished appearance before fastening the new pieces. A consistent reveal, often around 1/8 inch, can help create a clean, even edge. Locate framing—commonly spaced 16 inches on center—so the new trim can be secured reliably. After installation, fill and finish the joints, then check clearances around doors, windows, and hardware to make sure nothing binds or obstructs movement.

 Green Earth Wood