Achieving a flawless finish in trim work is essential for any professional. The way corners are cut can dramatically affect the overall look of a project. Reports show that over 70% of homeowners cite trim quality as a significant factor in their satisfaction with renovations. Mastering the art of cutting trim corners is crucial for craftsmen in the industry.
Expert Kevin McCloud, renowned for his expertise in home design and renovation, remarks, “How to cut trim corners perfectly for a professional look is more than just technique; it's about understanding materials and precision.” His insights highlight the importance of honing skills and mastering tools to ensure that each corner meets a high standard. Many contractors still struggle with achieving perfect corners, leading to noticeable gaps and uneven finishes that distract from the overall design.
It is essential to reflect on one’s approach to trim work. Even seasoned professionals can overlook critical details, resulting in the need for rework. A commitment to refining techniques and learning from mistakes can turn a good finish into a great one. Focusing on precision while cutting trim corners not only enhances the aesthetic appeal but also solidifies a craftsman's reputation for quality work.
When it comes to achieving a professional finish, mastering trim corners is essential. Trim corners involve a precise technique in managing how materials meet at edges. Many strive for perfection but often overlook the importance of accuracy in these areas. Small mistakes in corners can disrupt the entire aesthetic.
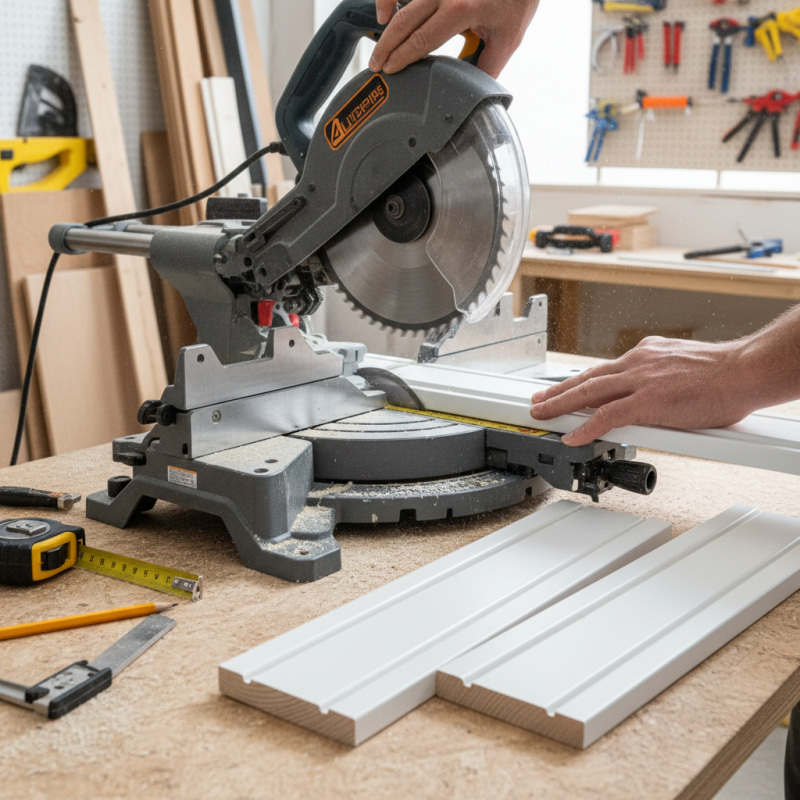
Consider using a miter saw for clean angles. However, not everyone finds this tool intuitive. Practice is crucial. Incorrect angles can lead to gaps or uneven lines, undermining your efforts. Using a straightedge can help guide cuts more effectively. It’s a simple yet powerful tool that can address potential flaws in your process.
Furthermore, take time to assess your work regularly. Even seasoned professionals encounter challenges with trim corners. A quick inspection can reveal areas needing adjustment. Making corrections early saves time later and ensures a more polished result. Ultimately, understanding trim corners is vital for anyone seeking to elevate their work. Continuous learning and adapting are key components of mastery.
This chart illustrates the importance levels of various factors influencing the mastery of trim corners for achieving a professional finish. Each factor is rated on a scale from 1 to 10, highlighting the critical areas to focus on for optimal results.
Achieving flawless trim corners requires the right tools and techniques. A professional finish often hinges on precision and quality. Industry reports indicate that improper trimming can lead to a 30% increase in material waste. This highlights the importance of mastering trim corner techniques.
Essential tools for trim corners include a quality miter saw, corner clamps, and a reliable measuring tape. A well-calibrated miter saw can make precise cuts at difficult angles. Corner clamps help hold pieces securely, ensuring a tight fit. However, even with the best tools, miscalculations can occur. It's crucial to measure multiple times before making cuts. A report from the National Association of Home Builders shows that 70% of professionals recommend double-checking measurements to avoid errors.
While quality tools are vital, skill development is equally important. Practice with different materials can enhance technique. Mistakes are part of the learning process. An experienced tradesperson knows that every error offers a lesson. Observing industry standards can guide improvement, but practical experience is where true mastery lies. Emphasizing hands-on learning can lead to better performance and fewer costly mistakes.
When it comes to achieving a perfect finish in trim corners, precision is essential. Professionals in the field often emphasize the importance of accurate measurement. According to industry reports, miscalculated measurements can lead to up to 30% of material waste. To avoid this, always measure twice before cutting. Use a reliable miter saw with the right blade for clean angles at 45 degrees.
Tips: Invest in a high-quality square to ensure your edges are straight. A square can help prevent errors. Keep in mind that every project may present unique challenges. Minor imperfections might arise despite careful planning. Adjusting your technique over time can yield better results.
Pay attention to the type of trim you are using. Wood, for instance, may expand or contract with humidity. This can alter your originally perfect angles. Remember that, even for seasoned professionals, achieving flawless corners can require multiple attempts. The journey to mastering trim corners is ongoing. Don't hesitate to reassess and try again.
| Step Number | Description | Tools Required | Estimated Time |
|---|---|---|---|
| 1 | Measure the corner angle for trimming | Tape Measure, Square | 5 minutes |
| 2 | Cut the trim using the correct angle | Miter Saw, Safety Glasses | 15 minutes |
| 3 | Dry fit the trim pieces | None | 10 minutes |
| 4 | Attach the trimmed corner pieces securely | Nail Gun, Finishing Nails | 20 minutes |
| 5 | Fill any gaps or nail holes | Wood Filler, Putty Knife | 15 minutes |
| 6 | Sand the filled areas for a smooth finish | Sander, Sanding Paper | 10 minutes |
Achieving a perfect finish at trim corners can elevate the aesthetics of any room. According to industry reports, a well-finished trim can add up to 10% of perceived value to a property. Proper painting and sealing are crucial steps in this process.
Preparation plays a vital role. Start by ensuring the corners are clean and free of dust. Use a high-quality primer to create a solid foundation. Reports indicate that primed surfaces bond better with paint. Apply the paint using a tapered brush for precision. This allows for better control at the angles, preventing unsightly drips or uneven coverage.
Tips: When sealing corners, opt for caulk that matches your paint color. A smooth application reduces gaps and improves air sealing. Also, consider using a damp cloth to smooth the caulk right after application. This trick can minimize the imperfections often left behind.
Mistakes can happen, even to seasoned professionals. Uneven caulk lines or brush stroke marks may appear. It's essential to evaluate the finish critically. If flaws are visible, redoing the corner is smarter than leaving it imperfect. Taking the time to correct these issues ensures a quality outcome, which reflects your dedication to craftsmanship.
Trimming corners can elevate the quality of your work. However, common mistakes can lead to a less polished finish. One frequent error is rushing the process. Many underestimate the importance of precision. Take the time to measure and mark clearly. This simple step can prevent mishaps later.
Another issue is using dull tools. A sharp blade is essential for clean cuts. Dull tools can create ragged edges, ruining the look. Don’t forget to change or sharpen your tools regularly. Additionally, avoid applying too much pressure when cutting. This can cause slips and uneven lines.
Neglecting to practice proper technique often leads to frustration. Some may find themselves overcomplicating the process as a result. Focus on mastering basic techniques first. This will help build confidence. Mistakes are part of improvement. Each flaw offers a chance to learn and refine skills. Remember to reflect on what went wrong and adjust your approach accordingly.
: Accurate measurement prevents material waste. Miscalculations can lead to 30% waste in some projects.
A reliable miter saw with a sharp blade is best for clean, precise 45-degree angles.
Invest in a high-quality square. It can help avoid errors and maintain alignment.
Don’t be discouraged. Adjust your technique and try again to achieve better results.
Clean the corners to remove dust. Use a high-quality primer for better paint adhesion.
Use caulk that matches the paint color. Smooth application reduces gaps and improves sealing.
Rushing the process can lead to errors. Take your time to measure and mark clearly.
Dull tools create ragged edges. Regularly sharpen or replace them for cleaner cuts.
Each flaw offers a chance to learn. Reflect on mistakes and adjust your technique accordingly.
Yes, even seasoned professionals face challenges. Mastery takes time and practice.
Mastering trim corners is essential for achieving a flawless, professional finish in any home improvement project. Understanding the basics of trim corners lays the foundation for success, while having the right tools significantly enhances precision and efficiency. This article provides a detailed step-by-step guide on how to cut trim corners perfectly for a professional look, covering essential techniques for measuring and cutting accurately.
In addition to the cutting process, the article emphasizes the importance of finishing touches like proper painting and sealing to ensure longevity and aesthetic appeal. It also highlights common mistakes to avoid, which can save time and effort in the long run. By following these guidelines, anyone can elevate their trim work to achieve the polished results they desire.
Green Earth Wood