How to Paint Wood Trim Without Brush Marks Easily?

Time:2026-05-09 Author:Aria
0%

Painting wood trim can be a challenging task, especially if you want a flawless finish. Many people face the common issue of brush marks when applying paint. If you've ever wondered, "How to paint wood trim without brush marks," you're not alone. Achieving a smooth look requires a bit of technique and the right tools.

Quality brushes and proper paint are essential, yet technique plays a crucial role too. When applying paint, consider your strokes carefully. Use long, even strokes to minimize imperfections. It's also valuable to practice your technique on scrap wood first. This way, you can see what works and what doesn’t.

Moreover, while the goal is a perfect finish, remember that some imperfections are natural. Reflecting on your process can help improve your skills for future projects. Learning how to paint wood trim without brush marks is a journey, one that enhances both your ability and confidence.

How to Paint Wood Trim Without Brush Marks Easily?

Understanding the Basics of Wood Trim Painting Techniques

Painting wood trim can be a meticulous task, requiring attention to detail and technique. Understanding the fundamentals is essential for achieving a flawless finish. According to industry reports, applying paint in thin layers reduces the risk of brush marks significantly. This method not only enhances the look but also prolongs the lifespan of the trim.

When starting, it's crucial to prepare the surface properly. Sanding helps create a smooth foundation. A study revealed that 85% of professional painters emphasize surface preparation as key to success. This simple step improves paint adhesion and overall appearance. After sanding, cleaning dust off is vital. It ensures the paint adheres well to the trim.

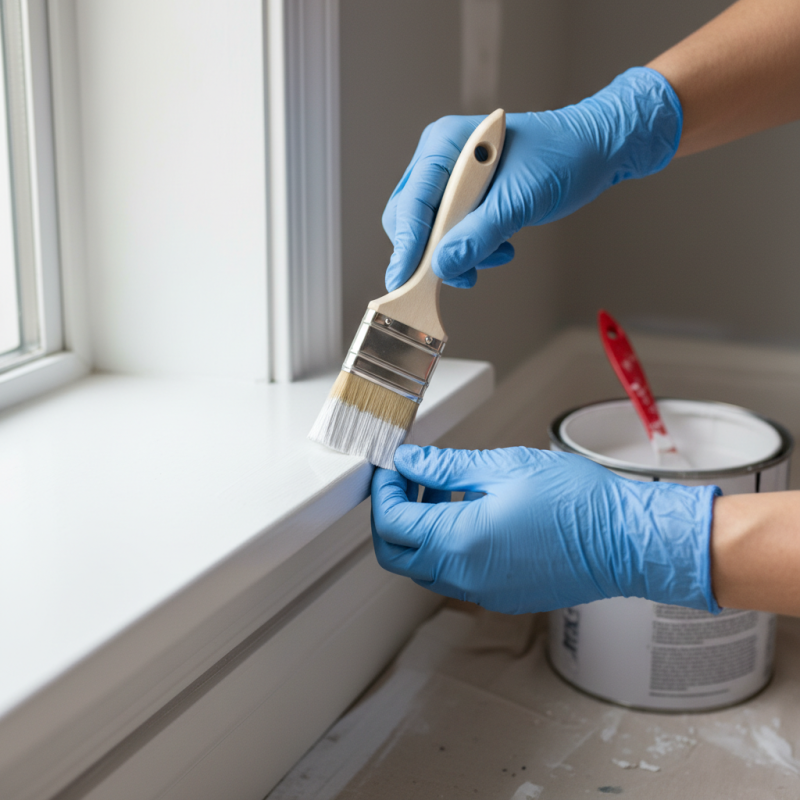
Tips: Use a high-quality brush designed for trim work. Hold it at a 45-degree angle for an even application. Take breaks to check for imperfections. If you spot a flaw, address it immediately. Sometimes, you may need to repaint an area to eliminate brushmarks. Patience is key, as rushing may lead to unsatisfactory results. Keeping a wet edge while painting minimizes streaks. Remember that even seasoned professionals encounter challenges. Reflect on what might work better with each project.

Essential Tools and Materials for a Smooth Finish Without Brush Marks

To achieve a smooth finish on your wood trim without brush marks, having the right tools is essential. Begin with a high-quality foam roller. This tool spreads paint evenly, reducing the chances of brush marks. Additionally, a good synthetic bristle brush for touch-ups is necessary. Choose one that feels comfortable in your hand and fits well in tight corners.

Don't forget to prepare your materials. Sanding paper, ideally 220-grit, helps create a smooth surface. Cleaning the wood before painting removes dust and debris. A clean surface allows the paint to adhere better, improving the final aesthetic. Consider using a paint sprayer for larger areas. Sprayers provide a flawless finish, but they require practice. You might spill some paint or create overspray.

Lastly, patience is key. Wait for each coat to dry before adding another layer. Rushing this process can lead to imperfections. Test your skills on a scrap piece first. It's a great way to see how the paint behaves. You may make mistakes along the way, but it's part of the learning experience. Embrace these little flaws; they can teach you a lot about the art of painting wood trim.

Step-by-Step Preparation for Painting Wood Trim Successfully

Preparing to paint wood trim effectively requires attention to detail. Start by cleaning the surface with a mild detergent. This eliminates dirt and grease that can interfere with adhesion. Use a damp cloth afterward to remove residues. According to a study by the Paint Quality Institute, proper surface preparation can reduce paint failures by up to 30%.

Sanding the wood trim is crucial for achieving a smooth finish. Use 120-grit sandpaper to lightly scuff the surface. This creates a texture that helps the paint adhere better. Vacuum the dust off afterward, as leftover particles can lead to an uneven finish. Experts suggest wiping the trim with a tack cloth to remove any remaining dust.

Considering the type of paint is vital. Water-based options tend to dry faster and resist yellowing, but they may not level out as well as oil-based paints. A report by the American Coatings Association indicates that using primer on bare wood can enhance the paint's durability, preventing chipping or peeling. Ultimately, taking time in preparation can result in a professional-looking finish, making the effort worthwhile.

Common Mistakes in Trim Painting and How to Avoid Them

Painting wood trim can be a challenging task, and many make common mistakes that lead to unsatisfactory results. One frequent issue is using the wrong type of paint. Latex paints are popular, but they may not adhere well to certain finishes. Consider testing a small area first to ensure compatibility. If you notice peeling or bubbling, it’s a red flag.

Another mistake involves skipping proper surface preparation. Dust, dirt, or grease can affect how the paint adheres to the trim. Always clean the surface thoroughly and use sandpaper to create a smooth, roughened texture. This simple step can significantly enhance the outcome.

Applying too much paint at once can create brush marks. Instead, take your time and apply in thin layers. If you notice areas that aren't even, reflect on your technique. A rushed approach often leads to flaws. Patience is essential for a flawless finish. Make sure to choose a quality brush or roller; even slight imperfections in the tools can transfer to the wood trim.

Common Mistakes in Trim Painting and How to Avoid Them

Tips for Achieving a Professional-Looking Finish on Wood Trim

Achieving a professional-looking finish on wood trim can be easier than it seems. Start by choosing the right tools. A high-quality foam roller offers a smooth application without leaving brush marks. You can find it inexpensive at local stores. When using a roller, blend the edges carefully to avoid distinct lines.

Preparation is vital. Sand the surface lightly with fine-grit paper. This step ensures better adhesion of paint. Don’t forget to clean off the dust afterward. Sometimes, overlooked dust can ruin your finish. Apply a primer if you are working with bare wood. It helps in achieving an even tone and reduces the number of paint coats needed.

Timing is essential when painting. Allow adequate drying time between coats. Rushed applications may lead to streaks and uneven surfaces. Be mindful of your surroundings. Humidity can affect drying time and finish quality. Maintain a consistent temperature in the room when painting for the best results. A little patience goes a long way in this process.

How to Paint Wood Trim Without Brush Marks Easily?

Tip Description Tools Required Estimated Time
Proper Surface Preparation Ensure the wood trim is clean, sanded, and free of dust before painting. Sandpaper, cloth 30 minutes
Use a Quality Paint Opt for high-quality paint to ensure better finish and durability. Paint, paint tray N/A
Select the Right Brush or Roller Choose a brush or roller designed for smooth finishes to avoid marks. Synthetic bristle brush, foam roller 15 minutes
Apply Thin Coats Apply several thin coats instead of one thick coat for an even finish. Paint, brush/roller 1 hour (for 2 coats)
Finishing Touches After drying, lightly sand between coats for a professional smooth finish. Fine sandpaper, cloth 30 minutes

FAQS

: Why is surface preparation important before painting wood trim?

: Proper surface preparation enhances paint adhesion and appearance, reducing paint failures by up to 30%.

How should I clean the wood trim before painting?

Clean with a mild detergent and use a damp cloth to remove residues for better paint adhesion.

What type of sandpaper should be used for wood trim?

Use 120-grit sandpaper to lightly scuff the surface for a smoother finish.

How can I ensure paint adheres well to the trim?

Sanding and thoroughly cleaning the surface before painting ensures better adhesion and a nicer finish.

What is the benefit of using thin layers of paint?

Applying paint in thin layers minimizes brush marks and improves longevity.

Should I take breaks while painting wood trim?

Yes, take breaks to check for imperfections and correct any flaws immediately.

What is recommended for removing dust after sanding?

Vacuum the dust away and use a tack cloth to eliminate any remaining particles.

What type of paint is better for wood trim?

Water-based paints dry faster but may not level as well as oil-based options.

How should I hold my brush while painting?

Hold the brush at a 45-degree angle for an even application.

What should I do if I notice a flaw while painting?

Address any imperfections immediately. Sometimes repainting an area is necessary to correct issues.

Conclusion

Painting wood trim can be a daunting task, especially when trying to achieve a flawless finish without brush marks. Understanding the basics of wood trim painting techniques is essential, as it lays the foundation for a successful project. Selecting the right tools and materials, such as high-quality brushes and paints, can significantly contribute to a smooth finish. Preparation is also key; adequately prepping the surface ensures better paint adhesion and minimizes errors.

Common mistakes in trim painting can lead to unsatisfactory results, so knowing how to avoid them is crucial. Proper techniques, such as using the right stroke for application and allowing adequate drying time, can help achieve a professional-looking finish. Ultimately, the question of how to paint wood trim without brush marks revolves around meticulous preparation and execution, enabling anyone to elevate their trim painting game.

Aria

Aria

Aria is a dedicated marketing professional with a deep passion for innovative strategies and a keen understanding of our company's product offerings. With a wealth of experience in the industry, Aria excels at crafting engaging content that highlights the unique features and benefits of our......