How to Prevent Wood Trim from Warping in Humid Weather

Time:2026-11-09 Author:Aria
0%

How to prevent wood trim from warping in humid weather starts with understanding that wood responds to moisture. The USDA Forest Products Laboratory’s Wood Handbook: Wood as an Engineering Material (FPL-GTR-190) explains that wood is hygroscopic: it gains or loses moisture as surrounding conditions change. Below the fiber saturation point—typically around 25 to 30 percent moisture content—changes in moisture can cause wood to shrink or swell. That movement can turn a neat baseboard into a bowed edge, or open a gap at a miter joint.

Wood technologist Eugene Wengert is known for practical guidance on wood moisture and drying. A careful paraphrase of that guidance is simple: “Control moisture before installation, because wood keeps responding to its environment.” This is a paraphrase, not a verified verbatim quotation. The distinction matters; reliable advice should not depend on invented quotes. For homeowners, the lesson is concrete: store trim indoors, allow it to acclimate, and check that the material is dry before fastening it. Seal exposed faces and cut ends, including the back when conditions call for it, and leave appropriate room for seasonal movement.

Still, coatings are not magic. A sealed board can warp if it is installed damp or exposed to persistent humidity. This guide explains how to prevent wood trim from warping in humid weather with practical steps for storage, acclimation, finishing, and installation. A small moisture meter reading may prevent a much larger repair.
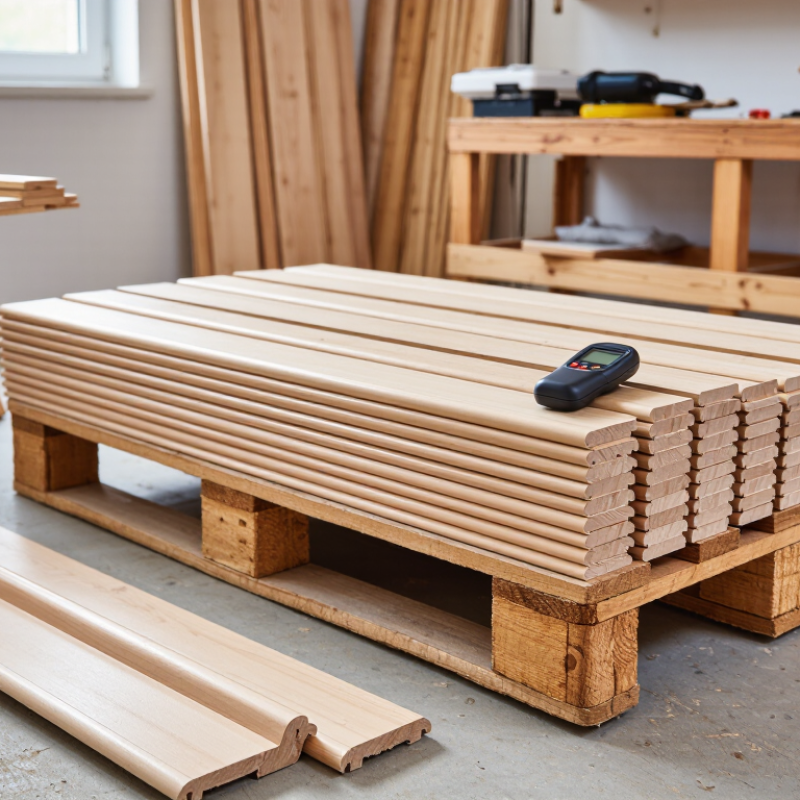
How to Prevent Wood Trim from Warping in Humid Weather

Understand How Humidity Causes Wood Trim to Warp

Wood trim is hygroscopic: its cell walls take in water vapor when surrounding air becomes damp. As moisture content rises, wood swells, mainly across the grain rather than along its length. A narrow casing board may therefore grow slightly wider, while its length changes very little. That uneven movement creates stress where trim is nailed, glued, or joined at a miter. If one face absorbs moisture faster than the other, the board can cup or twist. Wood responds slowly. A humid week may not cause visible change, but repeated seasonal swings can gradually loosen fasteners and open joints.

Indoor humidity can rise near bathrooms, kitchens, damp basements, or windows with condensation. Exterior trim faces rain and humid air, while its sheltered back may dry at a different rate. That difference matters. End grain is especially absorbent, so exposed cuts can take up moisture faster than sealed faces. Trim pressed tightly against a damp wall may also have little airflow for drying. These conditions do not guarantee warping, but they increase uneven moisture movement. After humid weather, look for cupped edges, swollen miters, or cracks in the paint. Those clues suggest movement, though they do not identify its cause by themselves.

Choose Moisture-Resistant Materials and Acclimate Them

Choose trim made from naturally durable heartwood, stable engineered wood, or another product rated for damp interiors. “Moisture-resistant” does not mean waterproof. Check the product’s intended-use guidance before buying, especially for bathrooms or laundry rooms. The USDA Forest Products Laboratory’s Wood Handbook reports that wood’s equilibrium moisture content is about 9.2% at 70°F and 50% relative humidity, rising to roughly 16% at 80% humidity. That gap matters: wood gains moisture from humid air, then expands across its grain. Small changes can make a long casing bow or open a miter joint.

Bring trim indoors before cutting, and let it adjust to the room where it will be installed. There is no reliable, universal acclimation period; species, thickness, packaging, and indoor conditions all matter. Use a moisture meter, and compare readings from several pieces rather than trusting one board. The USDA handbook places wood’s fiber saturation point near 30% moisture content; below that point, moisture changes affect its dimensions. Keep stock flat, off concrete, and away from wet walls. A week may help, but it is not proof. I’d still check the readings before installation. Seal cut ends and back surfaces, then maintain steady indoor humidity where practical.

Prepare and Seal Every Surface Before Installation

How to Prevent Wood Trim from Warping in Humid Weather

Prepare and Seal Every Surface Before Installation

Wood trim can absorb moisture from humid air, especially through exposed end grain and unfinished backs. Let the pieces sit in the room where they will be installed, with space between them for airflow. Check that they feel dry and lie flat before cutting. If one piece already bows, do not assume fasteners will pull it straight; that can create stress later.

Seal every surface before installation: front, back, edges, and cut ends. Use a finish suitable for the wood and the intended paint or stain, and follow its drying instructions. A thin, even coat is better than a heavy layer that stays tacky. Once you cut a board, seal the fresh end too. This step is easy to overlook when the room is warm and the work feels urgent. Still, trapped moisture can lead to movement after the trim is fixed in place.

Tips: Keep trim off damp floors, and avoid storing it against an exterior wall. Leave a small, consistent expansion gap where the installation details call for one. Humidity changes are not always predictable, so inspect the boards again before fastening them.

Install Trim with Room for Seasonal Movement

Wood trim expands as it absorbs moisture, mainly across the grain. Give it time to adjust before installation. Stack the boards flat in the room for several days, with spacers between them so air can circulate. Keep heating or cooling near its usual setting. A moisture meter can help compare the trim with the room’s conditions, though readings vary by wood species.

Leave a small clearance where trim meets a wall, floor, or adjoining piece, especially at long runs and inside corners. The exact gap depends on the trim’s width and expected humidity changes; avoid guessing at a large, visible opening. A narrow joint can often be covered with flexible, paintable caulk. Don’t pack it tightly with rigid filler. It may crack later.

Fasten trim securely, but avoid forcing every joint into a rigid, tight fit. Wider boards move more across their width, so fastening methods that allow slight movement can help. Check that nails enter framing where needed, and keep cut ends clean and square. Small details matter. I still find that rushing the acclimation step is tempting, particularly when a room looks ready, but that shortcut can show up later as lifted corners or open seams.

Control Indoor Humidity and Inspect Trim Regularly

Wood trim responds slowly to moisture in the air, so a single dry afternoon will not prevent warping. Keep indoor relative humidity fairly steady, ideally around 35 to 50 percent for many homes. A small digital hygrometer helps reveal patterns that a quick glance cannot. Check it in rooms where windows fog, laundry dries, or showers add moisture. If readings stay above 60 percent, run a dehumidifier or improve ventilation rather than waiting for visible damage.

Use exhaust fans during showers and cooking, and let them run briefly afterward. Fix plumbing leaks and damp window sills promptly; lowering room humidity will not solve water entering through a wall. In winter, avoid making rooms extremely dry, since wood can shrink and joints may open. The balance matters. It is not always easy to maintain, especially in older houses with uneven heating.

Inspect trim every few months, paying close attention to outside corners, window bottoms, and joints near floors. Look for bowed edges, widening seams, blistered paint, or dark spots. Press gently around suspicious areas; trim that feels soft may indicate hidden moisture. Take a photo of any gap and check it again later, since seasonal movement can look alarming but remain stable. Do not caulk over damp or deteriorating wood. Dry the area, identify the moisture source, and repair the trim only when conditions are suitable. A quick inspection can be imperfect, but regular checks make subtle changes easier to notice.

How to Prevent Wood Trim from Warping in Humid Weather - Control Indoor Humidity and Inspect Trim Regularly
Prevention Area Recommended Practice How Often What to Watch For
Indoor relative humidity Keep indoor relative humidity around 30%–50% where practical. Use a hygrometer to check conditions, and avoid sustained readings above 60%. Check during humid weather and after major changes in heating or cooling. Persistent high readings, condensation on windows, or a musty smell.
Moisture control Use air conditioning or a dehumidifier when indoor air is persistently humid. Vent bathrooms and kitchens outdoors, and repair plumbing or roof leaks promptly. Run ventilation during moisture-producing activities; investigate leaks as soon as they appear. Water stains, damp surfaces, peeling paint, or soft wood.
Air circulation Keep supply and return vents unobstructed. Leave space around trim and furnishings so air can circulate, especially along exterior walls. Check seasonally and when rearranging furniture. Stale, damp areas or condensation collecting near trim.
Trim inspection Look along the full length of baseboards, window casings, and door frames. Check joints, corners, and areas near plumbing or exterior openings. Monthly during humid seasons and after leaks or heavy rain. Gaps, swelling, bowing, raised edges, loose joints, or mold growth.
Paint and sealant Maintain intact paint or finish on exposed trim, including edges and end grain. Re-caulk open gaps where appropriate after the surface is dry and the cause of moisture is fixed. Inspect during routine home maintenance; touch up damaged finishes as needed. Cracked paint, open seams, bare wood, or failed caulk.
Cleaning and drying Wipe surface moisture with a dry cloth and avoid leaving wet cleaning products or standing water against wood trim. After spills, condensation, or cleaning. Repeated dampness or discoloration that returns after cleaning.
Response to warping Find and correct the moisture source before attempting repairs. Allow the trim and surrounding area to dry; replace wood that is badly damaged or decayed. Act promptly when a change is noticed. Warping that worsens, persistent dampness, or wood that feels soft.

FAQS

Why does wood trim warp in humid conditions?

Wood absorbs water vapor and swells, mainly across the grain. Different moisture levels on each face can make a board cup or twist.

Which areas of a home can expose trim to extra moisture?

Bathrooms, kitchens, damp basements, and windows with condensation are common spots. Trim behind a damp wall may also dry slowly.

What signs might suggest moisture-related movement?

Look for cupped edges, swollen miter joints, lifted corners, or cracked paint. These clues suggest movement, but they do not prove its cause.

How should wood trim be stored before installation?

Stack boards flat in the room for several days. Use spacers so air can move between them.

Why does the end grain need attention?

Cut ends absorb moisture faster than sealed faces. Keep cuts clean, and consider how exposed ends will be finished.

Should trim joints be packed tightly with rigid filler?

Not usually. A narrow joint may be covered with flexible, paintable caulk, while rigid filler can crack as the wood moves.

How much clearance should be left around trim?

The needed gap depends on board width and humidity changes. Avoid both a tight fit and a large, visible opening.

What installation shortcut can cause trouble later?

Skipping acclimation is tempting when a room looks ready. I still catch myself wanting to rush, but lifted corners can follow.

Conclusion

How to prevent wood trim from warping in humid weather starts with understanding how moisture affects wood. As humidity rises, wood absorbs moisture and expands; when conditions change, it can shrink or move. Choose naturally moisture-resistant or properly treated materials, and let the trim acclimate indoors before installation so it can adjust to the room’s conditions.

Before installing, seal all surfaces, including edges and cut ends, to slow moisture absorption. Fasten the trim securely while allowing a little room for seasonal movement, rather than forcing it tightly into place. Keep indoor humidity as steady as possible with ventilation or humidity control, especially in damp areas. Regularly inspect the trim for swelling, gaps, or loose fasteners, and address moisture problems promptly to help keep it straight and stable.

Aria

Aria

Aria is a dedicated marketing professional with a deep passion for innovative strategies and a keen understanding of our company's product offerings. With a wealth of experience in the industry, Aria excels at crafting engaging content that highlights the unique features and benefits of our......