A loose stair edge can catch a small shoe. A dark, slippery tread can turn one hurried step into a fall. Stair nosing—the edge finish fitted to each step—can improve visibility and provide a durable, consistent edge when selected and installed correctly. It cannot make a staircase completely fall-proof.
The World Health Organization estimates that 37.3 million falls each year are serious enough to require medical attention. That figure covers all ages and settings; it is not a stair-specific count. The CDC’s WISQARS injury-surveillance system also tracks fall-related injuries, helping families and safety professionals understand why prevention matters. Pediatric injury researcher Dr. Gary Smith’s published work supports a clear prevention principle: reduce hazards in children’s environments before injuries occur. This is a paraphrase of his prevention-focused research, not a verbatim quotation.
How to install stair nosing safely for family and kids means more than attaching a trim piece. The nosing must suit the stair material, sit firmly without rocking, and avoid creating a raised lip that could catch toes. Follow the product maker’s instructions, use compatible materials, and check every step for consistent alignment. Keep the staircase clear while the adhesive or fasteners are setting. Small details matter. A parent’s hand on the rail, a child’s sock on a smooth tread, and a poorly secured edge are real-world conditions worth considering. This guide explains practical checks, common installation mistakes, and when a qualified installer may be the safer choice.
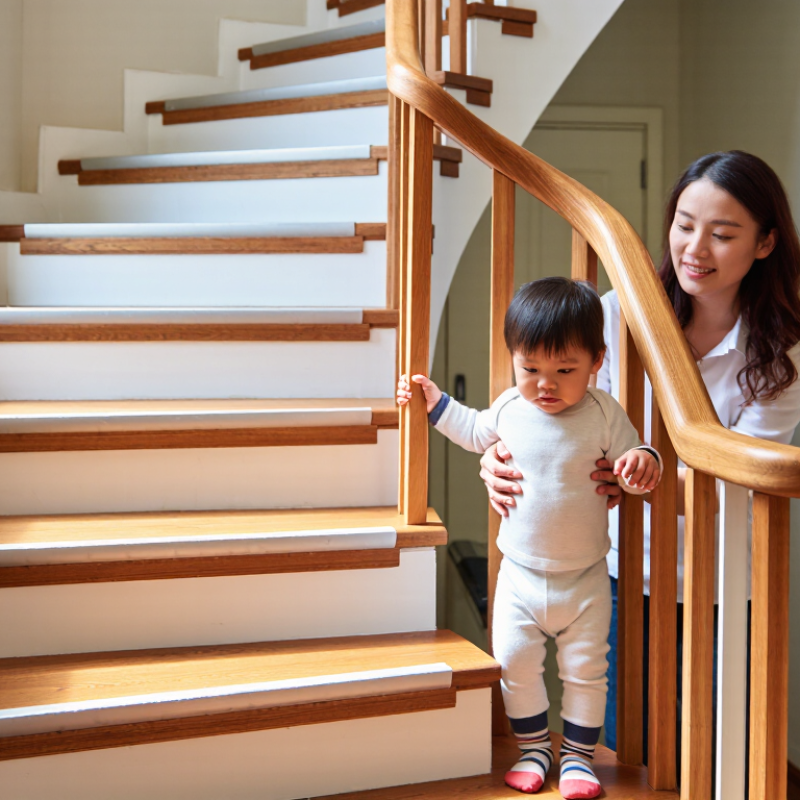
A stair nosing can improve edge visibility and protect a tread, but a poorly fitted piece may create a trip point. Under the IBC, tread depths within one stair flight generally cannot vary by more than 3/8 inch, subject to the locally adopted code and building conditions. That limit is not permission to make one step noticeably different. Measure from finished nosing to finished nosing, and check every tread after installation. A new profile can change usable depth, even when the underlying stair looked uniform.
For children, consistency matters as much as grip. A proud corner, loose fastener, or abrupt change in overhang can catch a small shoe. Keep nosings aligned, firmly secured, and free of sharp edges. Use a level and tape measure; recheck measurements after flooring or trim is added. Code checks can feel fussy. They are worth doing. I would not assume that matching the first and last steps proves every middle step is safe.
Tips: Compare the largest and smallest finished tread depths across the flight, not just neighboring steps. Follow the applicable IBC edition and local requirements, since details can differ. If the 3/8-inch limit is exceeded, pause and ask a qualified building professional to assess the stair before use. A quick visual glance is not enough.
A stair nosing should improve edge visibility without creating a toe-catching lip. The 2010 ADA Standards for Accessible Design, section 504.5, limit nosing projection to 1.5 inches beyond the tread below. Treat that as a maximum, not a target. A smaller, consistent projection can reduce snag points, especially for children moving quickly or wearing soft-soled shoes. Keep the leading edge rounded or beveled, and check that each step has a similar profile.
Measure the finished stair, not just the loose trim. Carpet, adhesive, and uneven tread edges can change the final projection. CDC WISQARS national injury estimates report more than 8 million emergency department visits for fall-related injuries each year across all ages; the figure is not stair-specific, but it underlines why small changes in footing matter. Test the nosing with a straightedge, then walk the stairs at child height and adult height. Look for shadows, sharp edges, loose sections, and abrupt changes between steps. One imperfect detail: a highly visible strip may still distract if it catches glare. Where the ADA applies, follow its full stair requirements and confirm local building rules before installation.
Use this comparison as a planning aid, not as a substitute for checking applicable building codes and the stair manufacturer’s installation instructions. A shorter projection alone does not establish that a stair is safe for children.
| Profile or check | Example dimension | How to assess it | Safety and compliance note |
|---|---|---|---|
| ADA projection limit | 1.5 in maximum (38 mm) | Measure the horizontal projection of the tread beyond the riser below. | ADA Standards section 504.5 sets this maximum where the standard applies. It is a limit, not a recommended target for every stair. |
| Low-projection example | 0.25 in (6 mm) | Check that the nosing sits securely and does not create a sharp or raised edge. | An example profile dimension only; verify suitability for the stair, material, and applicable local requirements. |
| Moderate-projection example | 0.5 in (13 mm) | Measure from the riser face below to the furthest horizontal point of the tread edge. | If the nosing projects beyond the riser below, ADA section 504.5 also limits the leading-edge radius or bevel to 0.5 in (13 mm). |
| Larger-projection example | 1.0 in (25 mm) | Check the full stair geometry, including tread depth and the riser below. | Below the stated ADA maximum, but this does not by itself confirm compliance with all stair requirements or prove child safety. |
| At-limit example | 1.5 in (38 mm) | Confirm the measurement carefully; do not exceed the maximum where ADA section 504.5 applies. | Being at the maximum is not a general recommendation. Other applicable standards may set additional requirements. |
| Tread depth check | 11 in minimum (280 mm) under ADA section 504.2 | For stairs covered by the ADA Standards, measure tread depth between vertical planes of the foremost projections of adjacent treads. | Check the standard’s measurement method and scope; do not assume that adding a nosing makes an undersized tread compliant. |
| Installation and upkeep | Follow the product instructions | Secure the nosing as specified, keep edges aligned, and inspect for looseness, damage, or uneven transitions. | Keep the walking surface clean and unobstructed. Have a qualified professional assess uncertain conditions or code questions. |
Reference: U.S. Department of Justice, 2010 ADA Standards for Accessible Design, sections 504.2 and 504.5. Applicability depends on the project and jurisdiction; verify current requirements with the relevant authority.
Preparing stair treads correctly is a key part of installing nosing safely for children. Start by reading the nosing manufacturer’s instructions, since preparation and fastening methods can vary. Remove dust, loose finish, old adhesive, and small debris from each tread. Even a thin crumb can affect how a piece sits. Check for moisture, damage, or uneven spots, and repair them before installation. The surface should be stable and dry.
Measure every tread rather than assuming they match. Dry-fit each nosing piece and check that its front edge sits flush without rocking. Trim carefully, keeping cut edges smooth and clear of the walking path. Use only adhesives or fasteners specified as suitable for the product and substrate. Follow the stated application and curing times. Keep children off the stairs until the installation is secure; a rushed return to normal use can undo careful work.
Tips: Use bright lighting and a vacuum to spot grit along tread edges. Recheck each piece by hand after fastening. If a tread is badly worn or the fit remains uncertain, pause and ask a qualified installer. It may feel overly cautious, but small gaps are easy to miss when working quickly.
A stair nosing should sit firmly against the tread, not bridge a hollow spot or rock when pressed. For children, even a small raised edge can catch a toe during a quick climb. Measure each step separately; older stairs often vary slightly in depth. Cut the nosing to fit, then dry-fit it before applying adhesive or installing fasteners. Check the full length with your hand and a straightedge.
Look for gaps, movement, and edges that sit proud of the tread. The front edge should meet the stair consistently, without an unexpected lip. Follow the product instructions for compatible adhesive, fastener placement, and curing time. Keep children off the stairs while tools are in use and until the installation is secure. Let it set fully.
Small checks matter. After fastening, press along the entire nosing and listen for clicking or shifting. Remove dust and debris that could interfere with contact. If a tread is uneven or damaged, correct that surface rather than forcing the nosing to bend over it. I have found that a careful dry fit saves rework, though it can feel slow on a busy day. Recheck the edges after use; a loose fastener or changing gap deserves attention.
When checking stair nosing in a home with children, inspect the edge profile, not just whether the strip feels secure. The ADA limits the radius of curvature at a stair’s leading edge to 1/2 inch. This is a maximum, not a target or a guarantee of safety. Small detail. Big consequence. An overly rounded edge may fail to meet that criterion, while a sharp or damaged edge can still snag clothing or scrape skin.
Use a radius gauge or suitable template to check several points across each step. A ruler alone cannot reliably show the curve. Look for chipped material, lifted trim, gaps, and edges that differ from one step to the next. It is easy to focus on the measurement and miss a loose corner. That deserves a second look. A photo can help record trouble spots, but it cannot replace a hands-on inspection.
During installation, keep children away from the stairs and follow the nosing product’s instructions. Afterward, check that each piece is firmly attached and creates no abrupt lip or snag point. The ADA applies in specific settings, and requirements for private homes can vary; ask a qualified building professional or local authority when compliance is uncertain. A careful measurement helps, but it is only one part of a child-safe stairway.
Tread depths within one flight generally cannot vary by more than 3/8 inch. Check the locally adopted code and building conditions. Measure finished nosing to finished nosing on every step.
No. Compare the largest and smallest finished tread depths across the entire flight. Middle steps can differ too. A quick glance can miss it.
A firmly attached, aligned nosing can improve edge visibility and protect the tread. Check for loose fasteners, raised corners, sharp edges, and sudden changes in overhang. Small shoes catch easily.
Remove dust, loose finish, old adhesive, and grit. Check for moisture, damage, or uneven spots. The surface should be stable and dry. Even a crumb can matter.
Dry-fit every piece. Its front edge should sit flush without rocking. After fastening, check each piece by hand. I might still overlook a tiny gap, so good lighting helps.
It is a maximum radius for the stair’s leading edge, not a target or safety guarantee. Use a radius gauge or suitable template. A ruler alone may not show the curve reliably.
Check for chipped material, lifted trim, gaps, sharp spots, and snag points. Inspect several places across each step. A photo can record damage, but it cannot replace hands-on checking.
Keep children away until the nosing is securely installed and any specified curing time has passed. Follow the product instructions. If the fit remains uncertain, ask a qualified installer.
Learning how to install stair nosing safely for family and kids starts with checking that every step is consistent, secure, and easy to distinguish. Measure the risers and treads, and address variations that could create a trip hazard, keeping the IBC’s stated 3/8-inch uniformity limit in mind. Choose a profile that improves edge visibility and grip without exceeding the ADA’s 1.5-inch projection limit. Always confirm that the selected product is appropriate for the stairs and follow its manufacturer’s preparation and installation instructions.
Before fitting, clean and prepare each tread as directed. Position every nosing for full contact, then fasten it securely so it cannot shift; check that the edges sit flush and do not create a raised lip. Finally, inspect each leading edge, including its shape and radius, with the ADA’s stated 1/2-inch limit in mind. Careful measurements and a final walk-through can help make stairs safer and more predictable for children and other household members.

Green Earth Wood