Damaged wood moulding can make a well-kept room look tired, especially around door frames, windows, and stair edges. Scratches, dents, loose joints, and small areas of rot often appear after years of cleaning, furniture movement, or changing humidity. Replacing the entire moulding is not always necessary. With careful inspection and suitable materials, many minor defects can be repaired cleanly and safely.
This guide explains How to repair damaged wood moulding without replacing it, using practical methods suitable for common interior projects. It covers surface cleaning, loose-piece preparation, wood filler, epoxy repair, sanding, priming, and final painting. Experienced decorators usually begin by checking whether the wood is structurally sound. Soft, dark, or damp timber may indicate deeper damage. Do not hide it with filler.
Small repairs reward patience.
A sharp scraper, fine sandpaper, a moisture-resistant filler, and a narrow putty knife can make a noticeable difference. Matching the original profile and paint sheen may require several attempts. Even professionals sometimes leave a faint repair line under strong side lighting. That is worth acknowledging. A perfect result depends on the moulding’s age, wood species, previous coatings, and humidity levels. Work slowly, protect nearby surfaces, and allow each material to cure according to its manufacturer’s instructions. The aim is not merely to conceal damage, but to create a durable repair that blends naturally with the surrounding trim.
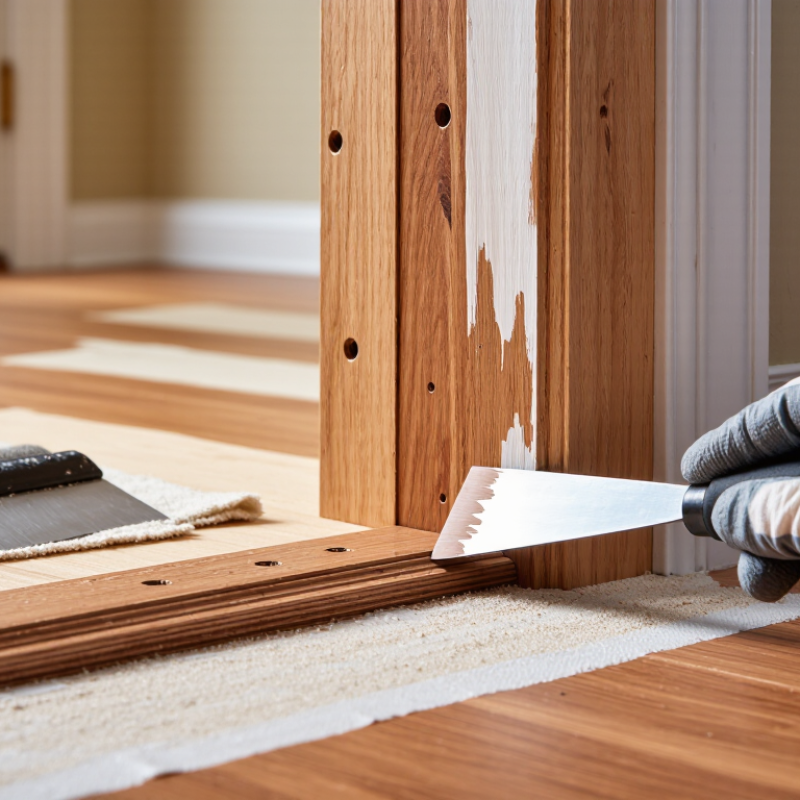
Wood moulding damage often begins quietly. Hairline cracks appear near joints, corners, or nail holes. The USDA Forest Products Laboratory’s Wood Handbook reports that wood may shrink about 2–5% radially and 5–10% tangentially during drying, depending on species. These movements can open seams and split painted surfaces. Seasonal humidity changes make the problem worse.
Water creates more serious damage. The USDA report notes that decay fungi generally need wood moisture above 20%. Soft spots, dark staining, swollen edges, and a musty smell may indicate hidden moisture. Impact damage is easier to identify. A dropped tool can leave dents, crushed fibres, or broken profiles. In older homes, poor installation may also cause gaps. I have repaired moulding that looked rotten but only had loose fasteners. Diagnosis matters.
Tips: Keep indoor relative humidity near 30–50%, a range recommended by the U.S. Environmental Protection Agency for indoor comfort and moisture control. Use a moisture meter before filling cracks. Small splits can receive compatible wood filler, sanding, and primer. Replace sections with deep decay or severe crushing. Match the profile carefully. A repair that looks acceptable from two metres away may fail under close light. I still recheck repaired joints after one heating season. Wood moves, and not every repair behaves perfectly.
Begin with a slow inspection. Press the moulding with a screwdriver. Solid wood should resist light pressure. Soft spots may indicate rot, not surface damage. The USDA Forest Products Laboratory reports that decay fungi generally require wood moisture above 20%. Use a moisture meter near stains, joints, and exterior walls. Check for swelling, cracked paint, loose nails, insects, and darkened end grain. A small stain can hide deeper deterioration.
Measure the damaged section and compare it with nearby profiles. Photograph each joint before removal. The EPA’s Moisture Control Guidance recommends drying wet materials within 24 to 48 hours to limit mold growth. Find the leak or condensation source first. Otherwise, a neat repair may fail again. I have seen careful patching collapse because a cold corner remained damp. That mistake is easy to repeat.
Before repairing damaged wood moulding, gather tools that match the damage. You will need a sharp utility knife, a small scraper, fine sanding blocks, a putty knife, and a clean brush. Keep a tape measure, pencil, and straightedge nearby for accurate cuts. Safety glasses and a dust mask are sensible, especially when sanding old paint.
Choose materials carefully. Use wood filler for shallow dents and small nail holes. Deep cracks or soft areas may need a two-part wood repair compound. For loose joints, prepare a suitable wood adhesive and several small clamps. Keep replacement moulding, fine-grit sandpaper, stain or paint, primer, and paintable caulk available. A moisture meter can help locate damp wood, but it is not essential for a small indoor repair. Check the existing finish in daylight before buying color. Samples often look different after drying.
I once skipped the moisture check and repaired a soft corner twice. That mistake cost more time than the tool. Remove loose fibers before applying filler, and never cover active moisture with paint. Test the filler on hidden wood first. Some products shrink slightly, so a second thin application may be necessary. Keep clean water, rags, and a waste container close by. A replacement piece should be slightly longer than the opening until the final measurement is confirmed. Measure twice. Cut once.
China Top Guide: How to Repair Damaged Wood Moulding?
Repairing damaged wood moulding starts with finding the cause. Check nearby walls, windows, and floors for moisture. Rot will return if dampness remains. Wear eye protection, remove loose paint, and clean the damaged area with a dry brush. Small cracks need flexible wood filler. Press it deeply into the opening, then level it with a putty knife. Let it cure fully. Rushing this part often creates a visible dip.
For chipped corners, rebuild the missing section with repair filler in thin layers. Shape each layer after it firms up. Sand gently with fine paper, following the moulding’s original lines. Small gaps at joints can be filled with paintable caulk. Keep the bead narrow. A thick bead looks untidy and may split later. For deep rot, cut back to solid wood and measure the profile carefully. A matching replacement piece is usually stronger than filling a large hollow.
I once repaired a window trim that looked dry, but its rear edge was soft. The surface repair failed because I ignored hidden moisture. That mistake changed my method. I now probe suspicious areas with a small screwdriver before filling them. Prime repaired wood, then apply two light finish coats. Allow drying time between coats. Do not hide active rot under paint. If the moulding feels loose, the wall moves, or decay extends behind it, consult an experienced carpenter. Surface work cannot solve structural movement.
Repairing damaged wood moulding begins with careful sanding. Remove loose fibres, old flakes, and shallow dents with medium-grit sandpaper. Keep the paper flat against the profile. This prevents rounded edges and uneven shadows. For narrow grooves, fold the sandpaper around a thin wooden stick. I usually finish with fine-grit paper and wipe away dust using a slightly damp cloth. Do not rush this stage. Small scratches often appear after painting.
Use a compatible wood filler for cracks and missing corners. Let it harden fully before sanding it level. A repair may feel smooth but still show a dull patch under bright light. I check the surface near a window, then inspect it from different angles. That extra check has saved me from repeating paintwork. It is not a perfect method, but it catches flaws early.
Apply a thin primer coat before painting the restored moulding. Thin layers preserve the carved detail better than one heavy coat. Use a small angled brush for edges and a clean brush for broader faces. Allow each coat to dry according to the product instructions. Lightly sand raised fibres between coats. Paint can hide defects, but it cannot correct them. Protect the finished moulding from moisture and hard impacts. Seal exposed edges carefully, especially near floors, windows, or doors. Keep the room ventilated while coatings dry. After installation, clean the surface with a soft, dry cloth rather than abrasive materials. Areas with frequent contact may need inspection after several months.
Sanding, painting, and protecting restored wood moulding
This chart shows the approximate abrasive grain size for common FEPA P-grade sandpapers used when restoring wood moulding. Start with a coarser grit only when necessary to remove damaged finish, then progress to finer grits for a smooth surface. Remove all sanding dust before applying primer and paint, and use a suitable protective topcoat after the paint has fully dried according to the product instructions.
Look for hairline cracks, open joints, dents, dark stains, swollen edges, or soft areas. Musty smells can suggest hidden moisture. Some damage looks worse than it is.
Wood expands and shrinks as humidity changes. Cracks often appear near joints, corners, and nail holes. Seasonal movement can reopen a repaired seam.
Inspect nearby walls, windows, and floors for dampness. Probe soft areas gently with a small screwdriver. A moisture meter can provide useful confirmation.
Keep a utility knife, scraper, putty knife, sanding block, brush, tape measure, and straightedge nearby. Wear safety glasses and a dust mask. Keep rags close.
Remove loose fibers and dust from the opening. Press compatible wood filler into the crack, then level it carefully. Let it cure fully before sanding.
Apply repair filler in several thin layers. Shape each layer after it firms up. Sand along the moulding’s original lines. Thick layers may sag or crack.
Replace sections with deep rot, crushed fibers, or large hollow areas. Cut back to solid wood and match the existing profile. Keep the replacement piece slightly long until measuring is confirmed.
Sand gently, then apply primer and two light finish coats. Use paintable caulk for narrow joint gaps. Check the color in daylight. It may still look different nearby.
Do not cover active moisture with filler or paint. Do not rush curing between coats. I once ignored a soft rear edge and repaired the same corner twice. That was avoidable.
This guide explains how to identify and repair damaged wood moulding before deciding to replace it. It covers common problems such as cracks, chips, loose joints, gaps, moisture damage, and wood rot, along with their possible causes. Before beginning, inspect the affected area carefully to determine whether the damage is cosmetic or structural. The guide also recommends preparing suitable tools and materials, including cleaning supplies, filler, adhesive, replacement wood pieces, sandpaper, primer, and paint.
Readers will learn How to repair damaged wood moulding without replacing it through a practical, step-by-step process. Minor cracks and chips can be cleaned, filled, and reshaped, while larger gaps may require carefully fitted wood patches. Rotten sections should be removed and rebuilt with sound material. After the repair has cured, sanding creates a smooth surface for painting or staining. Finally, applying protective finishes and controlling moisture can help preserve the restored moulding and prevent similar damage in the future.

Green Earth Wood